¡Hola!
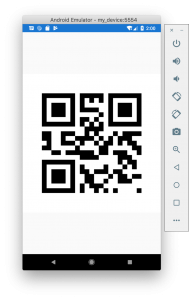
Normalmente, cuando queremos pintar un código QR en Xamarin Forms, utilizamos la librería ZXing seguramente a través del NuGet ZXing.Net.Mobile. El problema lo podemos tener cuando queremos modificar los colores con los que se pinta el QR, debido a que no tenemos la opción en la librería para poder modificarlos. Un ejemplo básico para mostrar un QR en Xamarin Forms sería algo así:
1 2 3 4 5 6 7 8 9 10 11 12 13 14 15 16 17 18 | public partial class MainPage : ContentPage { public MainPage() { InitializeComponent(); ZXingBarcodeImageView qrImage = new ZXingBarcodeImageView() { BarcodeFormat = BarcodeFormat.QR_CODE, BarcodeOptions = new EncodingOptions() { Width = 350, Height = 350 }, BarcodeValue = "www.google.es", }; this.Content = qrImage; } } |
El resultado sería algo así:
 Por cierto, podríamos haberlo hecho directamente en XAML sin ningún problema.
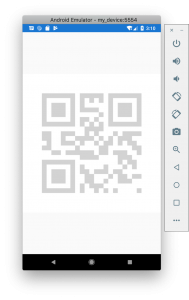
Pero, ¿qué pasa si queremos cambiar el color del QR para, por ejemplo, ponerle un color gris claro que indique que ya no es válido? Pues realmente el control ZXingBarcodeImageView no nos lo va a permitir. Por suerte, tampoco es ningún problema, el código lo tenemos disponible en GitHub y no tiene mucho misterio 🙂 Eso sí, no nos deja muchos puntos donde poder extender la funcionalidad, así que nos va a tocar copiar el código que nos interesa (es poco) y darle ese punto de flexibilidad que vamos a necesitar.
Empezamos creando nuestro control que compartirán nuestras plataformas nativas, en este caso, iOS y Android:
1 2 3 4 5 6 7 8 9 10 11 12 13 14 15 16 17 18 | public class ExtendedZXingBarcodeImageView: ZXingBarcodeImageView { public static readonly BindableProperty QRColorProperty = BindableProperty.Create("QRColor", typeof(IQRColor), typeof(ExtendedZXingBarcodeImageView)); public IQRColor QRColor { get { return (IQRColor)this.GetValue(QRColorProperty); } set { this.SetValue(QRColorProperty, value); } } } |
Donde IQRColor es:
1 2 3 4 5 | public interface IQRColor { Color Foreground(int x, int y); Color Background(int x, int y); } |
Veremos un poco más abajo que esos valores x e y corresponden a la posición de cada píxel del QR.
Ahora nos toca el código de cada plataforma. Empezando por iOS:
1 2 3 4 5 6 7 8 9 10 11 12 13 14 15 16 17 18 19 20 21 22 23 24 25 26 27 28 29 30 31 32 33 34 35 36 37 38 39 40 41 42 43 44 45 46 47 48 49 50 51 52 53 54 55 56 57 58 | [assembly: ExportRenderer(typeof(ExtendedZXingBarcodeImageView), typeof(ExtendedZXingBarcodeImageViewRenderer))] namespace QRColor.iOS { public class ExtendedZXingBarcodeImageViewRenderer : ViewRenderer<ExtendedZXingBarcodeImageView, UIImageView> { ExtendedZXingBarcodeImageView formsView; UIImageView imageView; protected override void OnElementPropertyChanged(object sender, PropertyChangedEventArgs e) { Regenerate(); base.OnElementPropertyChanged(sender, e); } protected override void OnElementChanged(ElementChangedEventArgs<ExtendedZXingBarcodeImageView> e) { formsView = Element; if (imageView == null) { imageView = new UIImageView { ContentMode = UIViewContentMode.ScaleAspectFit }; base.SetNativeControl(imageView); } Regenerate(); base.OnElementChanged(e); } void Regenerate() { if (!string.IsNullOrEmpty(formsView?.BarcodeValue)) { var writer = new ZXing.Mobile.BarcodeWriter { Renderer = new BitmapRenderer(formsView.QRColor) }; if (formsView.BarcodeOptions != null) writer.Options = formsView.BarcodeOptions; writer.Format = formsView.BarcodeFormat; var code = formsView.BarcodeValue; Device.BeginInvokeOnMainThread(() => { var image = writer.Write(code); imageView.Image = image; }); } } } } |
Y la clase BitmapRenderer:
1 2 3 4 5 6 7 8 9 10 11 12 13 14 15 16 17 18 19 20 21 22 23 24 25 26 27 28 29 30 31 32 33 34 35 36 37 | public class BitmapRenderer : IBarcodeRenderer<UIImage> { private readonly IQRColor qRColor; public BitmapRenderer(IQRColor qRColor) { this.qRColor = qRColor; } public UIImage Render(BitMatrix matrix, BarcodeFormat format, string content) { return Render(matrix, format, content, new EncodingOptions()); } public UIImage Render(BitMatrix matrix, BarcodeFormat format, string content, EncodingOptions options) { UIGraphics.BeginImageContext(new CGSize((float)matrix.Width, (float)matrix.Height)); CGContext currentContext = UIGraphics.GetCurrentContext(); for (int i = 0; i < matrix.Width; i++) { for (int j = 0; j < matrix.Height; j++) { currentContext.SetFillColor(matrix[i, j] ? ToCGColor(qRColor.Foreground(i, j, matrix)) : ToCGColor(qRColor.Background(i, j, matrix))); currentContext.FillRect(new CGRect((float)i, (float)j, 1f, 1f)); } } UIImage imageFromCurrentImageContext = UIGraphics.GetImageFromCurrentImageContext(); UIGraphics.EndImageContext(); return imageFromCurrentImageContext; } private static CGColor ToCGColor(Xamarin.Forms.Color color) { return new CGColor((nfloat)color.R, (nfloat)color.G, (nfloat)color.B, (nfloat)color.A); } } |
Ahora vamos con el código para Android:
1 2 3 4 5 6 7 8 9 10 11 12 13 14 15 16 17 18 19 20 21 22 23 24 25 26 27 28 29 30 31 32 33 34 35 36 37 38 39 40 41 42 43 44 45 46 47 48 49 50 51 52 53 54 55 56 57 58 59 | [assembly: ExportRenderer(typeof(ExtendedZXingBarcodeImageView), typeof(ExtendedZXingBarcodeImageViewRenderer))] namespace QRColor.Droid { public class ExtendedZXingBarcodeImageViewRenderer : ViewRenderer<ExtendedZXingBarcodeImageView, ImageView> { ExtendedZXingBarcodeImageView formsView; ImageView imageView; public ExtendedZXingBarcodeImageViewRenderer(Context context) : base(context) { } protected override void OnElementPropertyChanged(object sender, PropertyChangedEventArgs e) { Regenerate(); base.OnElementPropertyChanged(sender, e); } protected override void OnElementChanged(ElementChangedEventArgs<ExtendedZXingBarcodeImageView> e) { formsView = Element; if (imageView == null) { imageView = new ImageView(Context); base.SetNativeControl(imageView); } Regenerate(); base.OnElementChanged(e); } void Regenerate() { if (!string.IsNullOrEmpty(formsView?.BarcodeValue)) { var writer = new ZXing.Mobile.BarcodeWriter { Renderer = new BitmapRenderer(formsView.QRColor) }; if (formsView != null && formsView.BarcodeOptions != null) writer.Options = formsView.BarcodeOptions; writer.Format = formsView.BarcodeFormat; var code = formsView.BarcodeValue; Device.BeginInvokeOnMainThread(() => { var image = writer.Write(code); imageView.SetImageBitmap(image); }); } } } } |
Y la clase BitmapRenderer:
1 2 3 4 5 6 7 8 9 10 11 12 13 14 15 16 17 18 19 20 21 22 23 24 25 26 27 28 29 30 31 32 33 34 35 | public class BitmapRenderer : IBarcodeRenderer<Bitmap> { private readonly IQRColor qRColor; public BitmapRenderer(IQRColor qRColor) { this.qRColor = qRColor; } public Bitmap Render(BitMatrix matrix, BarcodeFormat format, string content) { return Render(matrix, format, content, new EncodingOptions()); } public Bitmap Render(BitMatrix matrix, BarcodeFormat format, string content, EncodingOptions options) { var width = matrix.Width; var height = matrix.Height; var pixels = new int[width * height]; var outputIndex = 0; for (var y = 0; y < height; y++) { for (var x = 0; x < width; x++) { pixels[outputIndex] = matrix[x, y] ? qRColor.Foreground(x,y).ToAndroid().ToArgb() : qRColor.Background(x, y).ToAndroid().ToArgb(); outputIndex++; } } var bitmap = Bitmap.CreateBitmap(width, height, Bitmap.Config.Argb8888); bitmap.SetPixels(pixels, 0, width, 0, 0, width, height); return bitmap; } } |
Hecho esto, ahora vamos a pintar nuestro QR de color gris:
1 2 3 4 5 6 7 8 9 10 11 12 13 14 15 16 17 18 19 20 21 22 23 24 25 26 27 28 29 30 31 32 | public partial class MainPage : ContentPage { public MainPage() { InitializeComponent(); ExtendedZXingBarcodeImageView qrImage = new ExtendedZXingBarcodeImageView() { BarcodeFormat = BarcodeFormat.QR_CODE, BarcodeOptions = new EncodingOptions() { Width = 350, Height = 350 }, QRColor = new GrayQRColor(), BarcodeValue = "www.google.es", }; this.Content = qrImage; } class GrayQRColor : IQRColor { public Color Background(int x, int y) { return Color.White; } public Color Foreground(int x, int y) { return Color.LightGray; } } } |
Y nos quedaría algo así:
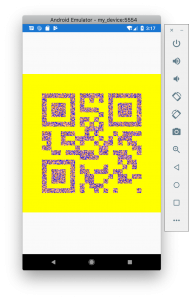
 Obviamente, para cambiar simplemente el color, no sería necesaria la interfaz IQRColor, pero claro, no podríamos hacer cosas tan horteras como estas:
1 2 3 4 5 6 7 8 9 10 11 12 13 14 15 16 17 18 19 20 | class UglyQRColor : IQRColor { private readonly Random random = new Random(); public Color Background(int x, int y) { return Color.Yellow; } public Color Foreground(int x, int y) { var val = random.Next(3); if(val == 0) return Color.Pink; if (val == 1) return Color.Blue; return Color.Orange; } } |
Y el resultado…
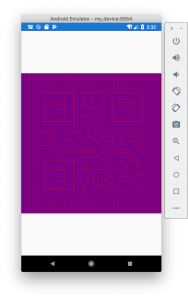
 Y con la x e y que recibimos, podríamos hacer cosas tan bonitas como..
1 2 3 4 5 6 7 8 9 10 11 12 13 14 15 16 17 18 19 20 | class UgliestQRColor : IQRColor { private readonly Random random = new Random(); public Color Background(int x, int y) { if (x % 2 == 0) return Color.Blue; return Color.Red; } public Color Foreground(int x, int y) { if (y % 2 == 0) return Color.Blue; return Color.Red; } } |

Gracias Luis, estaba peleando con zxing y con este post me queda el 50% solucionado, el otro 50% es como incorporar una imagen en el centro del QR y que siga siendo valido, he visto que muchos lo consiguen incluso con Xamarin, pero tras días haciendo pruebas no lo consigo, alguna idea?
Desde ya , Muchas gracias por tus aportes, sobretodo los de Xamarin 😉